
|
Short answer: Most UV curing failures are dose or spectrum mismatches, not bad adhesive. Match the LED wavelength to the photoinitiator (365 nm for surface cure and many acrylates, 395/405 nm for depth), deliver enough dose (irradiance × time), and monitor lamp output continuously. A few failed LEDs can under-cure parts without any visible alarm. |
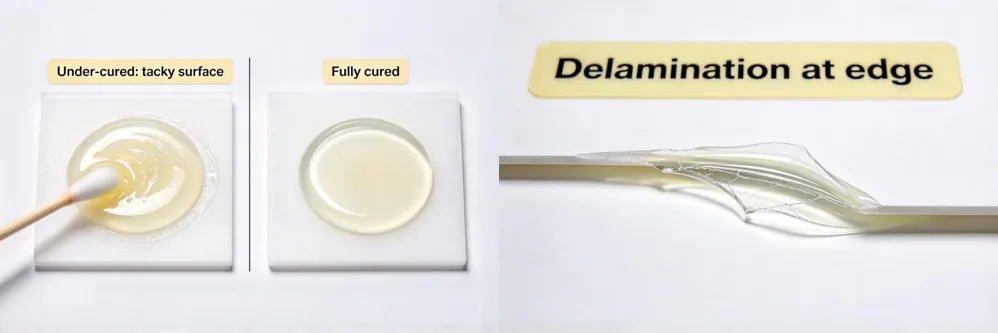
A UV adhesive that cured perfectly at the sample stage can start failing in production for no obvious reason. Surfaces stay tacky, a coating peels at the edge, or a reinforced joint lets go in the customer's thermal cycling test. The adhesive is usually blamed first. In our experience, the cause is more often the light: the wrong wavelength for the photoinitiator, too little dose at production speed, or LEDs that have slowly lost output or failed without anyone noticing. This article shows how to tell these causes apart and how to set up a curing process you can measure and prove.
Diagnose the symptom first
Each failure points to a different part of the process. Use this table to narrow down the cause before you change anything.
|
Symptom |
Most likely causes |
First check |
|---|---|---|
|
Surface stays tacky, inside is hard |
Oxygen inhibition at the surface; wavelength too long for surface cure; irradiance too low |
Is the wavelength right for the photoinitiator? Is peak irradiance high enough? |
|
Surface is hard, bottom is soft or liquid |
Too little dose for the thickness; wavelength does not penetrate; shadowed areas |
Measure the dose at the part; check the thickness against the TDS |
|
Delamination or poor adhesion |
Under-cure at the bond line; light blocked by the substrate; contamination; shrinkage stress |
Is the bond line actually reached by the light? Was the surface clean? |
|
Yellowing or brittleness |
Too much dose or heat; the part runs too slowly or too close to the lamp |
Measure the part temperature and the dose, and compare with the TDS |
|
Quality changes from batch to batch or over weeks |
LED output loss; dead LEDs; distance or conveyor speed changed |
Compare today's radiometer reading with your baseline |
Wavelength: 365 vs 395 vs 405 nm
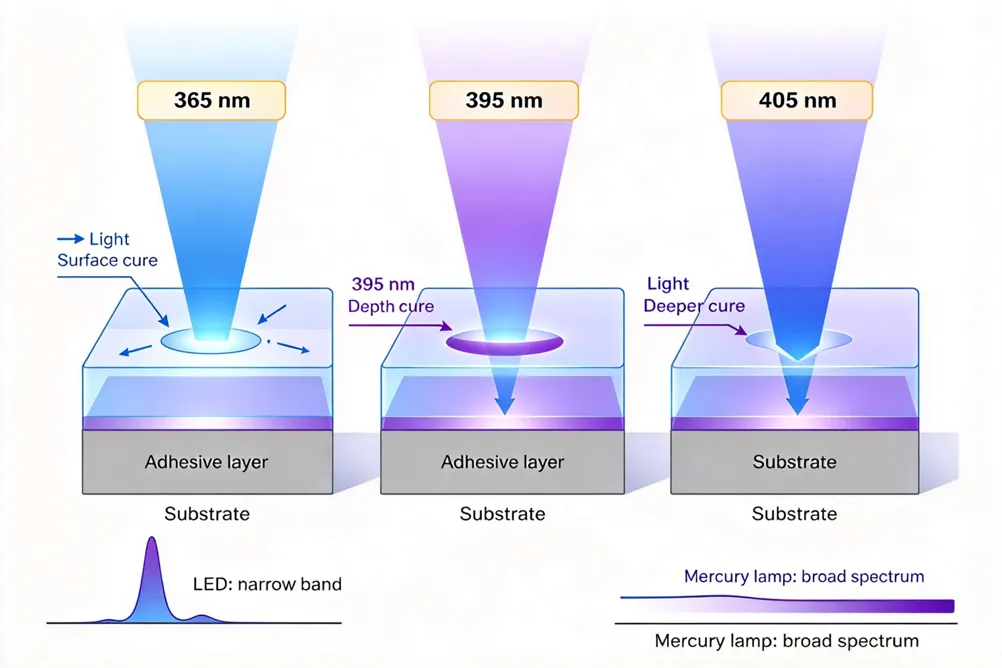
A UV adhesive cures because its photoinitiator absorbs light and starts the reaction. If the LED's wavelength does not match the photoinitiator's absorption, much of the energy is wasted, however strong the lamp is. LED lamps emit in a narrow band, so this match matters more than it did with broad-spectrum mercury lamps.
• 365 nm is absorbed close to the surface. It is the usual choice for good surface cure, many acrylates and thin coatings, and it helps against surface tack.
• 395 nm and 405 nm penetrate deeper into the material and through some lightly tinted or UV-stabilized plastics. They suit thicker sections and depth cure, but on their own they can leave a tacky surface with some formulations.
• Mixed wavelengths are sometimes used when a part needs both a dry surface and full cure in depth.
The adhesive's TDS is the final authority. It states which wavelength range the material is designed for and often gives a recommended dose. If the TDS was written for a mercury lamp, ask the adhesive supplier for LED curing data before you choose a wavelength. For PCB coatings specifically, see our guide to the optimal UV wavelength for PCB curing .
Irradiance vs dose: the math in one paragraph
Two numbers describe the light at the part, and they are often confused. Irradiance (mW/cm²) is how strong the light is at a given moment. Dose (mJ/cm²), also called energy density, is the total light the part receives: dose = irradiance × exposure time. Most TDS values give a dose, sometimes with a minimum irradiance. You need both: enough irradiance to overcome oxygen inhibition at the surface, and enough dose to complete the cure.
On a conveyor, exposure time depends on the length of the irradiation window in the direction of travel and the conveyor speed. A simple example:
|
Step |
Value |
Note |
|---|---|---|
|
Irradiation window length |
100 mm |
Length of the lit area in the direction of travel |
|
Conveyor speed |
2 m/min = 33.3 mm/s |
Production setting |
|
Exposure time |
100 ÷ 33.3 ≈ 3 s |
Time the part spends under the light |
|
Average irradiance at the part |
1,000 mW/cm² |
Measured with a radiometer at the working distance |
|
Dose |
1,000 × 3 ≈ 3,000 mJ/cm² |
Compare with the dose in the TDS |
The example numbers are for illustration only. Two practical points follow from the formula. If you speed up the conveyor to raise output, the dose falls in proportion. If you raise the lamp or the part gets thicker, the irradiance at the bond line falls too. That is why the only reliable number is the one measured at the part, at production speed and at the real working distance.
|
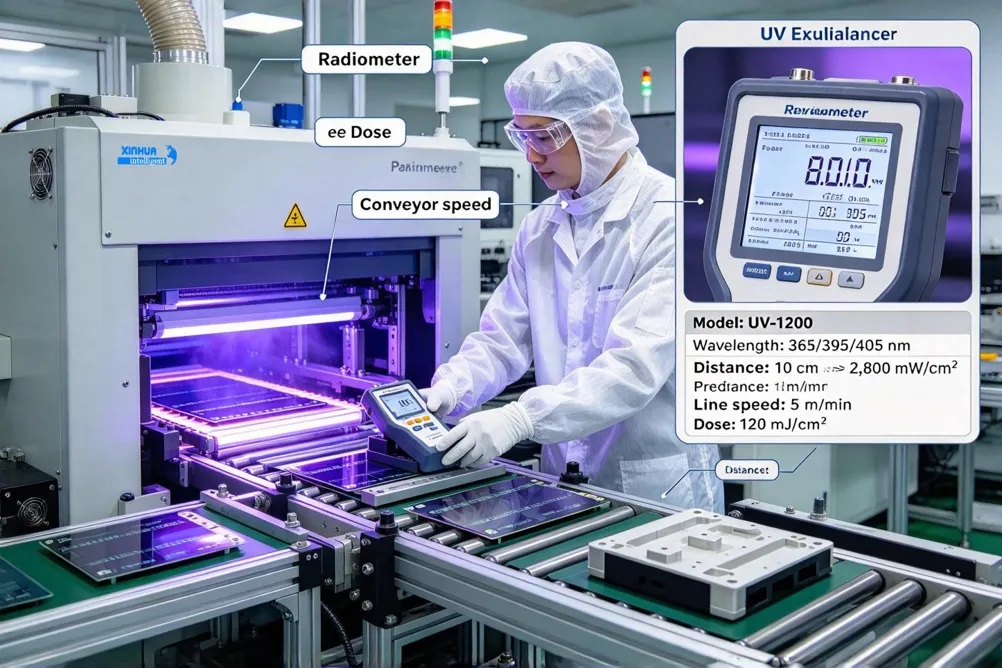
Measure on the conveyor, not under a static lamp. A radiometer that travels through the oven with the parts records both the peak irradiance and the dose the parts actually receive. Record the distance, the conveyor speed and the wavelength setting with each reading. |
The silent killer: LED degradation and dead LEDs
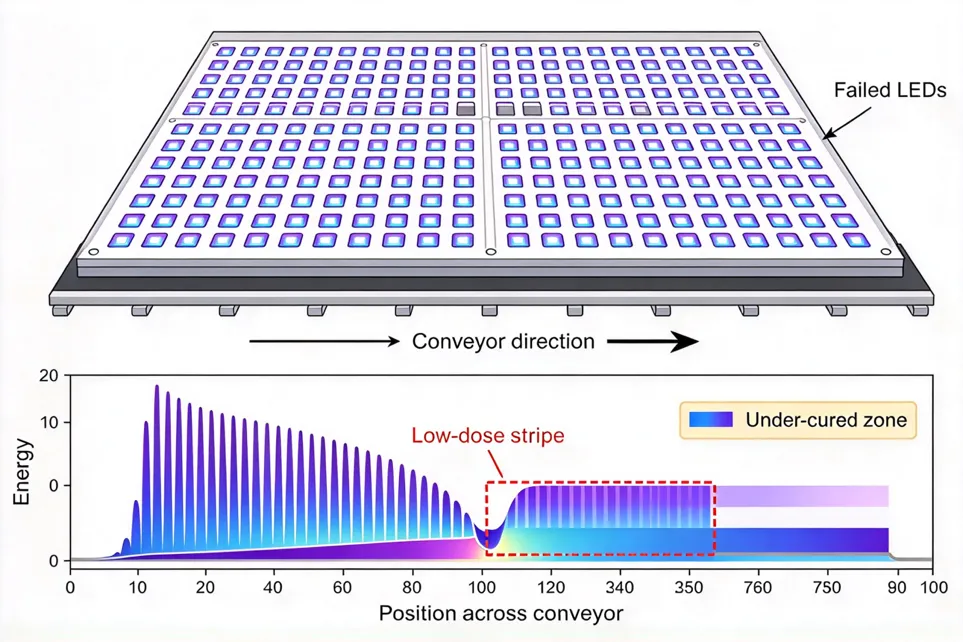
UV LED lamps do not fail like a light bulb. Their output falls slowly over thousands of hours, and individual LEDs in an array can fail while the rest keep working. Neither is easy to see. 365 nm light is almost invisible, and a 395 nm lamp with several dead LEDs still looks bright to the eye.
The result is a process that drifts out of specification without an alarm. A dead LED in a linear array creates a narrow stripe of low dose across the conveyor. Parts that run under that stripe are under-cured in one area, while the rest of the part looks fine. These parts often pass visual inspection and fail later as delamination at the customer.
Three layers of protection close this gap:
• Single-LED failure alarm. The oven monitors each LED and raises an alarm when one fails, so you know immediately instead of at the next complaint.
• Real-time energy detection. A sensor monitors the light output continuously and alarms when it falls below the limit you set.
• Daily radiometer check. Run a radiometer through the oven at the start of each shift or each day and log the reading. Compare it with the baseline taken when the process was approved, and set an action limit with your quality team.
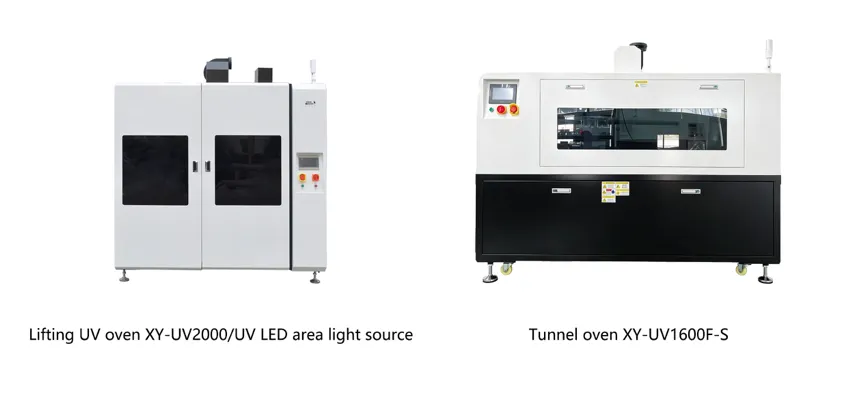
On XINHUA curing ovens, single-LED failure alarm and real-time energy detection are available as options. For battery and new-energy lines, where a delaminated part can stay hidden until much later, we recommend them as part of the specification.
Tunnel oven, lifting oven or area light source?
The right equipment depends on your part, your line layout and how much floor space you have.
|
Criterion |
Tunnel LED oven |
Lifting UV oven |
UV LED area light source |
|---|---|---|---|
|
XINHUA example |
XY-UV1600F-S |
XY-UV2000 |
UV LED area light source |
|
How parts move |
Continuous conveyor through the oven |
Conveyor with a lifting structure |
Part held still under the lamp, or the lamp is built into a machine |
|
Footprint |
Long, in line with the conveyor |
Reduced footprint thanks to the lifting structure |
Smallest; fits into a station or fixture |
|
Best for |
Continuous production of PCBs, FPCs and assemblies |
New-energy lines where floor space and throughput both matter |
Spot, fixture or bench curing; integration into automated machines |
|
Connection to the line |
In-line flow operation, single, double or triple track |
In-line flow operation, double track |
External I/O control interface |
|
Monitoring |
Single-LED alarm and real-time energy detection (optional) |
Single-LED alarm and real-time energy detection (optional) |
LED protection against short circuit, overcurrent and over-temperature |
The tunnel oven offers 365, 395 or 405 nm, a customizable track width and a recommended exposure distance of 10–50 mm, according to the product brochure. The area light source lets you set power independently as a percentage and offers automatic, manual, step and pulse irradiation modes. Its LEDs are rated for 20,000 hours (rated, per brochure). All specifications are customizable and subject to configuration, so we confirm them for your project in the quotation.
Cooling and heat-sensitive parts
LED curing runs much cooler than mercury lamps, because LEDs do not send infrared heat onto the part. The part still warms up: the curing reaction gives off heat, and the absorbed UV light turns into heat too. Thin FPCs, plastic housings and parts with sensors can be sensitive to this.
XINHUA ovens offer air cooling or water cooling for the LED heads. Air cooling is simpler and fits most lines. Water cooling keeps high-power lamps at a steady temperature, which keeps their output stable over long shifts. For heat-sensitive parts, you can also lower the irradiance and extend the exposure, or use step or pulse irradiation modes, as long as the total dose still meets the TDS.
Make the curing process provable
Customers in automotive electronics and new energy increasingly ask how you know every part was cured. A clear answer has four parts: the wavelength and dose required by the TDS, the oven settings that deliver it, continuous monitoring of the lamp, and a log of daily radiometer checks. Our curing ovens run on our own UV LED curing machine control software V1.0 (software copyright 2023SR0592565), and the optional monitoring functions give you the alarms this record needs.
For a broader checklist on choosing an oven, read what to consider when choosing a UV LED curing oven , or see our full range of UV LED curing systems .
FAQ
Why is my UV adhesive still tacky on the surface?
Usually because of oxygen inhibition. Oxygen in the air slows the reaction at the surface. A shorter wavelength such as 365 nm, a higher peak irradiance or a longer exposure normally solves it. Check the TDS for the recommended wavelength and minimum irradiance.
Is 395 nm or 365 nm better for PCB coating?
It depends on the coating's photoinitiator. Many coatings cure well at 365 nm, which helps surface cure. Others are designed for 395 nm, which penetrates deeper. Follow the coating's TDS, and if it does not specify an LED wavelength, ask the coating supplier.
How do I measure UV dose on a conveyor?
Send a radiometer through the oven on the conveyor at production speed and at the real working distance. It records the peak irradiance and the dose. Use a radiometer that matches your LED wavelength, and log each reading with the settings.
How long do UV LED lamps last?
Our UV LED area light source is rated for 20,000 hours (rated, per brochure). Real life depends on cooling, power setting and operating hours. Output falls gradually rather than stopping suddenly, which is why monitoring and regular measurement matter more than the rated figure.
Can the curing oven be connected to my existing conveyor?
Yes. Our tunnel and lifting ovens are designed for in-line flow operation, and the area light source has an external I/O interface for automated equipment. Send us your conveyor height, width and flow direction, and we will confirm the connection.